Introduction
What is BIR Excel Uploader?
BIR Excel Uploader is an offline web application to easily convert excel file to BIR DAT files required to be sent to esubmission@bir.gov.ph.
Important Prerequisite
It is a must that you have prior experience using BIR RELIEF or Alphalist Data Entry to fully understand this tool.
About Us
We are not from the BIR and we are not in anyway connected with the BIR, we are just accountants trying to help fellow accountants.
How To Convert Excel File to BIR DAT File
Save Time and Effort
Instead of encoding one by one in RELIEF or Alphalist Data Entry, this tool will easily convert the excel file to fully compatible BIR DAT File. This tutorial is applicable to all BIR DAT Files.
In this example we will create RELIEF Purchases DAT File.
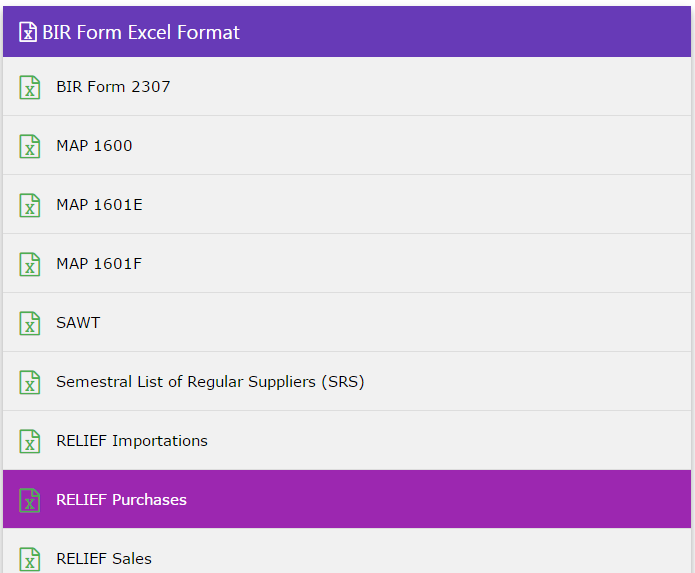
Prepare the Excel Template
Click the excel icon to choose the excel template to be used.
Click RELIEF Purchases to download the template. Downloaded files were usually saved at your downloads folder, or depends on your browser settings.
Open the file and take time to analyze the template. Row1 is fixed, do not edit or format Row1. DO NOT work directly in the template, always use a working file then paste your data to Row2 onwards, leaving Row1 untouched.
Template Field Requirements:
- Vendor_TIN - required, 9-digit numbers only, 000000000 is not acceptable. Please download the bonus file to know more about formatting TINs.
- companyName - required for non-individual, no special characters allowed.
- lastName, firstName, middleName - required for individual, no special characters allowed.
- address1, addres2 - optional
- number data - all required, dont leave it blank, put zero instead. Always round you numbers to two decimal places to avoid diffirence on the total.

Critical Warning
Again, DO NOT edit Row1 and DO NOT work directly in the template. Common mistake on working directly in the template is selecting the whole column then clicking the comma ( , ) number format. In effect, Row1 was edited, resulting the whole column to errors. To resolve this error, download a new template.
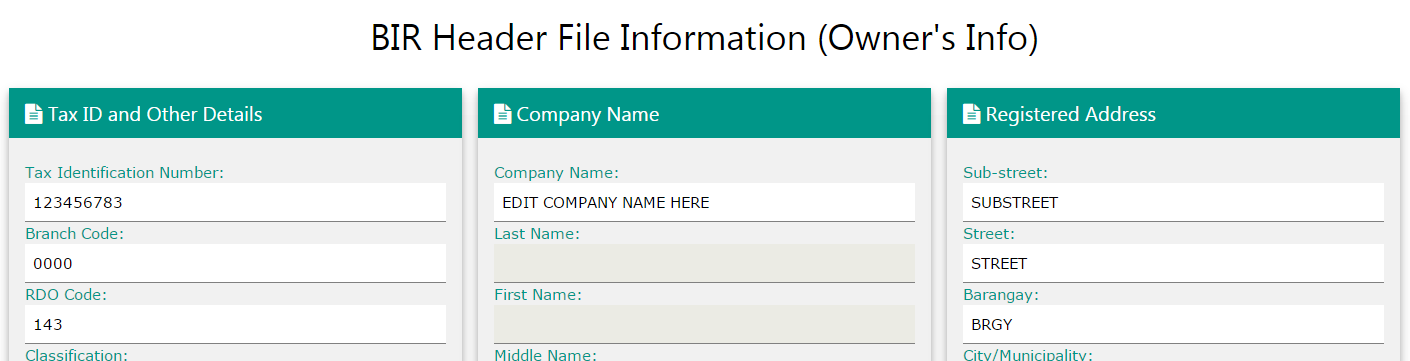
Set BIR Header File (Owner's Info)
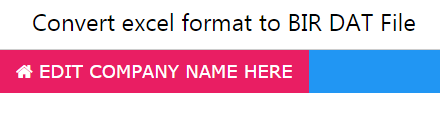
Click "EDIT COMPANY NAME HERE" to set BIR Header Information. This is important because all DAT File will include this information
All fields are required, DO NOT put dummy data, this will be part of your DAT File.
Click Save BIR Header File. You can save as many TINs as you want, all data and details will auto switch based on the TIN that you will use.

Generate DAT File
Once done on the template preparation and BIR Header Information, its time to convert your excel file template to BIR DAT File. All fields are required, accepts "xls" file only. Reporting Period is always end of the month.
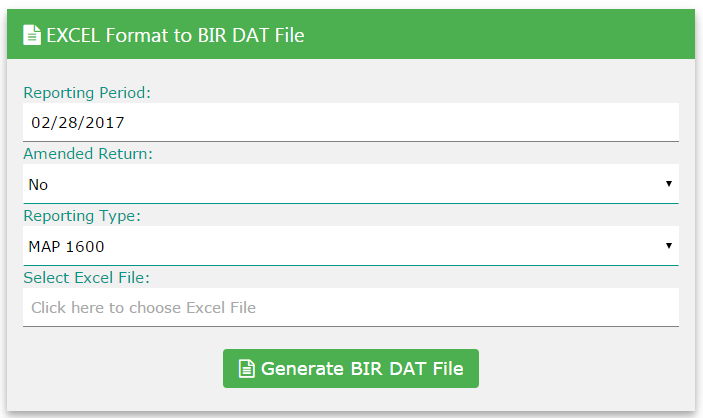
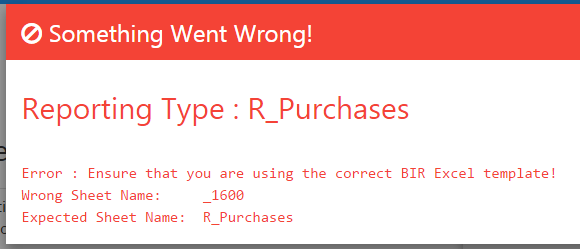
Choose the reporting type that you want to generate. Every reporting type has its own corresponding excel template. Please ensure that you are using the matching excel file template with the correct reporting type. On this example, RELIEF Purchases matches Purchases Template.

Click "Generate BIR DAT File". Keep attention on the error prompts, if any. Take time to understand what it is trying to say then adjust/revise accordingly. Sample error below shows that reporting type does not match the excel template by checking the sheetName(_1600) of the file.
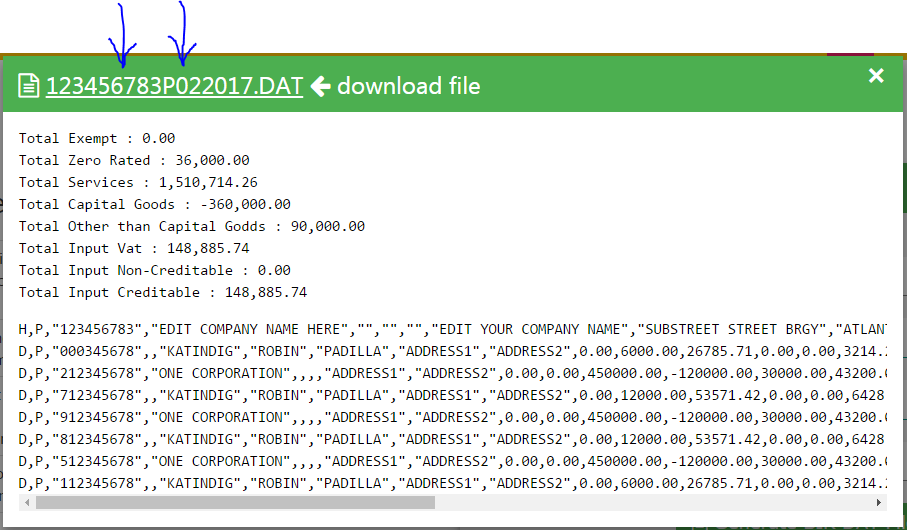
If there are no errors, proceed with inputing Non-Creditable Input VAT if any, then click "Continue" to proceed or "Abort" to cancel.

If you continue, generated dat file will be ready for download. Double check all the balances to ensure file converted matches the excel file template. Depends on your settings, usually downloaded files were saved on your Downloads folder.
Validate DAT File
Quality Assurance Step
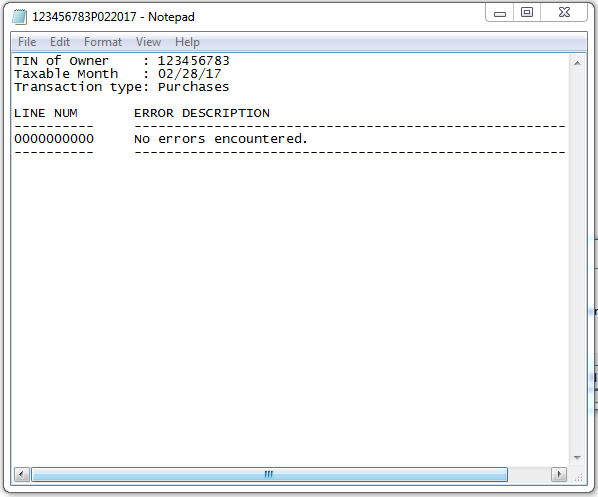
Before sending to esubmission@bir.gov.ph, it is required to validate the DAT File to ensure that it is an error free. While our system went through rigorous testings and its fully compatible, BIR Validation Module is the ultimate test to ensure compatibility.
In this example we are validating RELIEF Purchases.
Open BIR RELIEF Validation Module. Ensure that TIN, Reporting Month and Reporting Type matches your DAT File.
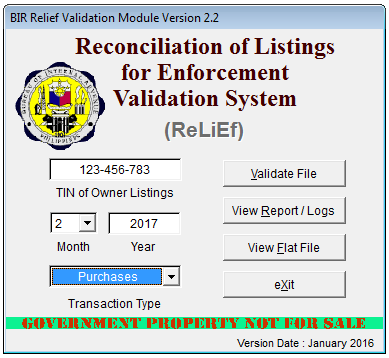
Click "Validate File" to browse the downloaded DAT File. In this example the downloaded dat file is in the Downloads folder.
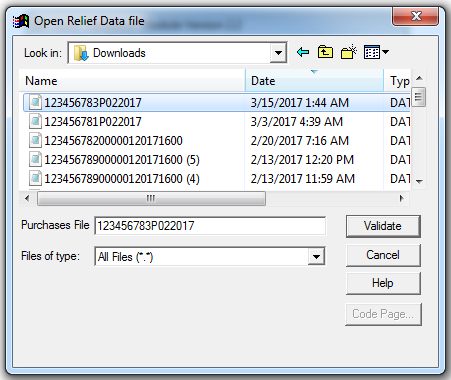
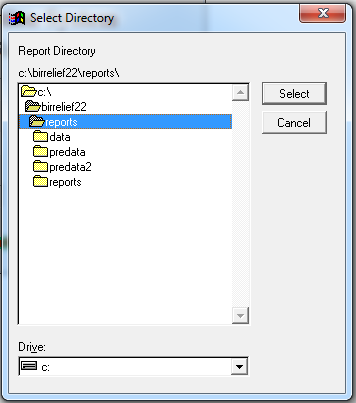
After selecting the downloaded file, click "Validate" to generate the report. Select the folder where you want to save the validation report then click "Select".
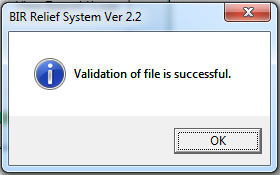
Validation Successful
you're ready to submit thru esubmission or attach to EFPS
For EFPS users, please take note of the location of the file. The validation module is appending a serial number at the end of the DAT file.
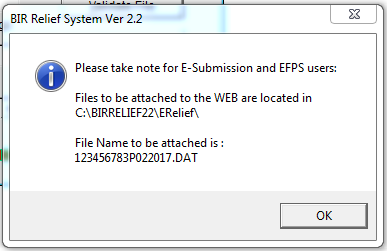
For non-EFPS users, get your file from Downloads Folder.
How to Register and Login
When Registration is Required
Registration is only required if you are going to convert excel file with more than 20 rows.
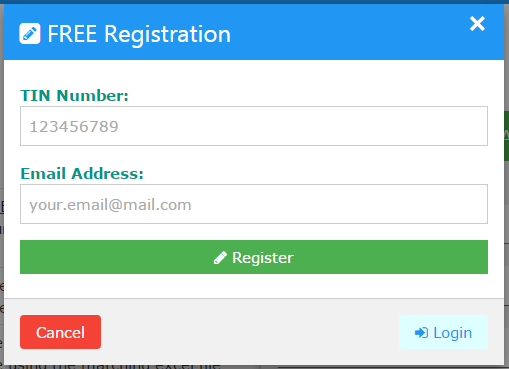
Click the register link located at the upper right corner of the page.

Fill out the fields then click the green register button. TIN is fixed, once registered you can not change this. Initial password will be sent to your email address, please do not use dummy email. You can use one email address to register multiple TINs.
Email Confirmation Required
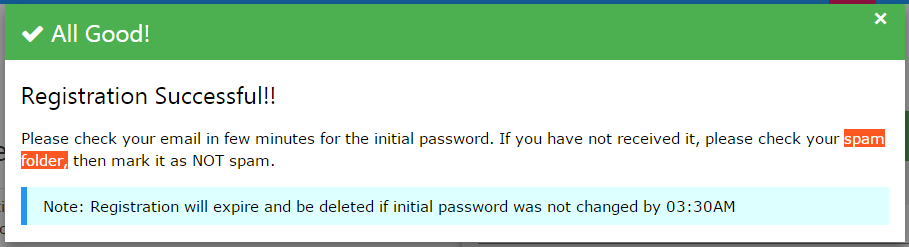
Once registration is successful, please check your email in few minutes. If you have not received it, check your spam folder then mark it NOT spam. All registration will expire and be deleted if initial password was not changed by 03:30AM. If you misspelled the email address, you need to wait for the registration to get expired before you can register your TIN again.
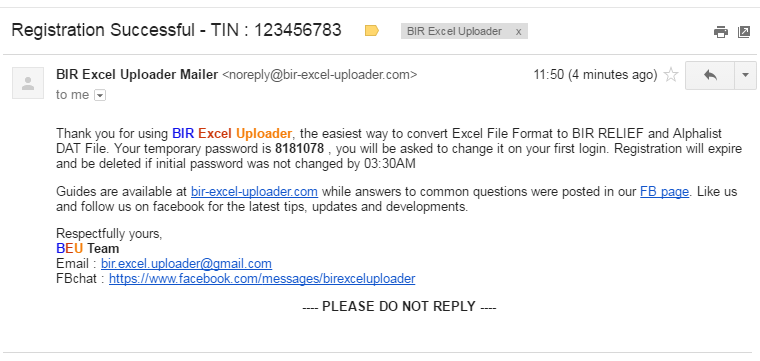
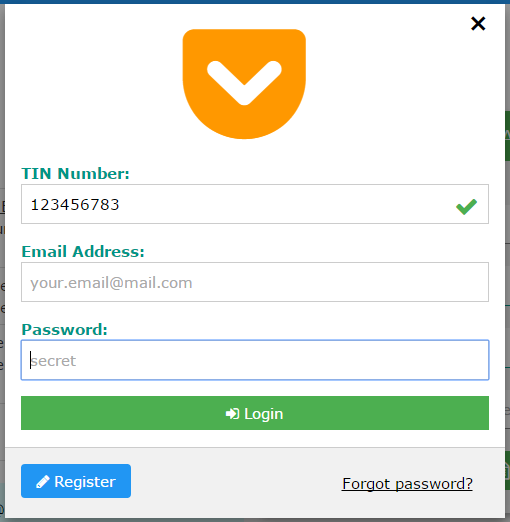
Change your initial password. Upon first login, you will be asked to change the initial password. Click the login link at upper right corner of the page, enter your registered TIN, email address and the 7-digit initial password.
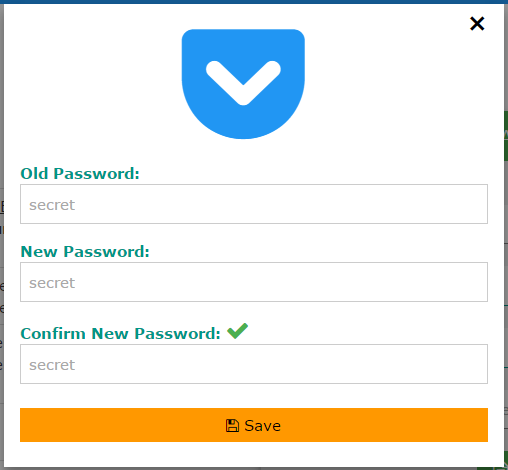
Change your password. Old password is your initial password, enter twice your chosen password, then click save.
Final Step
FINALLY, login with your newly set password. Once successfully login, you will be redirected to the registered page.
Ready to Get Started?
Follow this guide to convert your Excel files to BIR DAT format efficiently.
Start Learning