This tutorial assumes that the user has prior knowledge of using BIR
RELIEF DATA Entry Application. If you have'nt heard that application before,
bir-excel-uploader.com is
not for you yet. Nothing beats knowing the real thing, please head on to
bir.gov.ph and learn it first.
Prepare the Excel Template
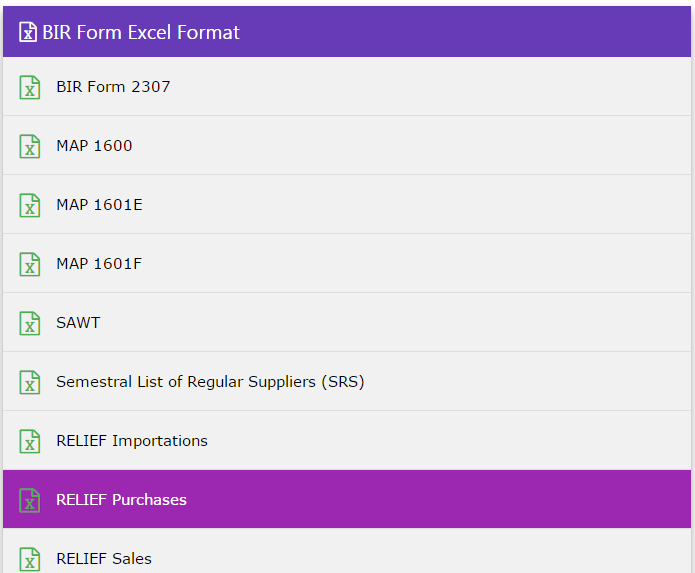
Click the excel icon to choose the excel template to be used.
Click RELIEF Purchases to download the template. Downloaded
files were usually saved at your downloads folder, or depends on
your browser settings.
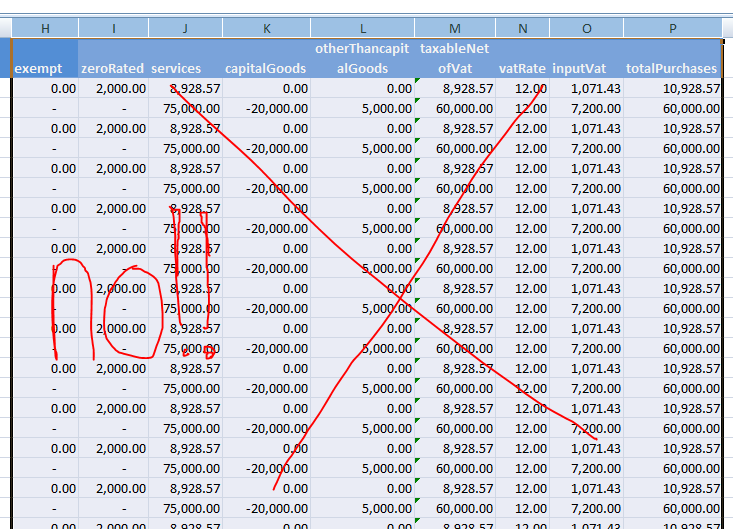
Open the file and take time to analyze the template. Row1 is
fixed, do not edit or format Row1. DO NOT work directly in the
template, always use a working file then paste your data to Row2
onwards, leaving Row1 untouched.
Vendor_TIN
- required, 9-digit numbers only, 000000000 is not acceptable.
Please download the bonus file to know more about formatting TINs. companyName - required for non-individual, no
special characters allowed. lastName, firstName,
middleName - required for individual, no special characters
allowed. address1, addres2 - optional number data - all required, dont leave it blank,
put zero instead. Always round you numbers to two decimal places to
avoid diffirence on the total.
Again, DO NOT edit Row1 and DO NOT work directly in the
template. Common mistake on working directly in the template is
selecting the whole column then clicking the comma ( , )
number format. In effect, Row1 was edited, resulting the whole
column to errors. To resolve this error, download a new template.
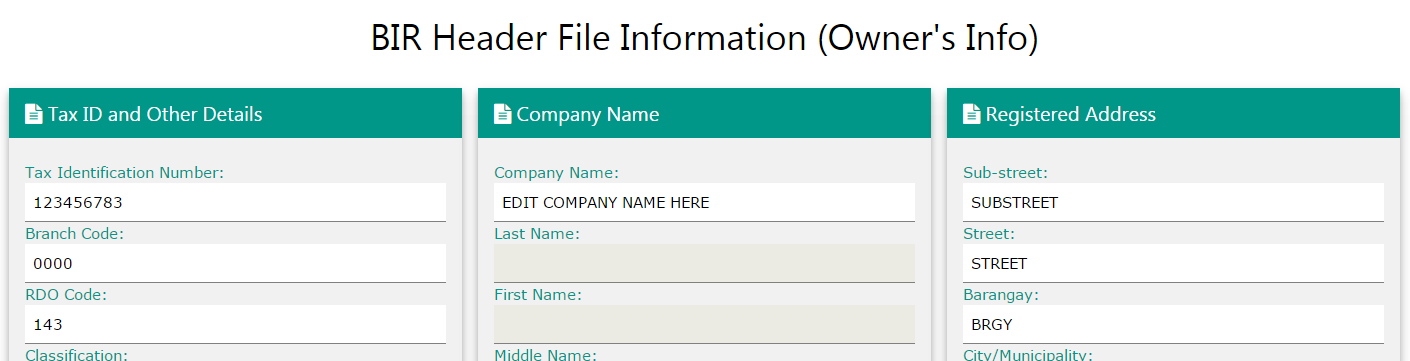
Set BIR Header File (Owner's Info)
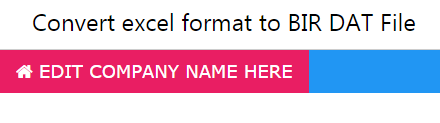
Click "EDIT COMPANY NAME HERE" to set BIR Header Information. This is important because all DAT File will include this information
All fields are required, DO NOT put dummy data, this will be
part of your DAT File.
Click Save BIR Header File. You can save as many TINs as you
want, all data and details will auto switch based on the TIN that
you will use.
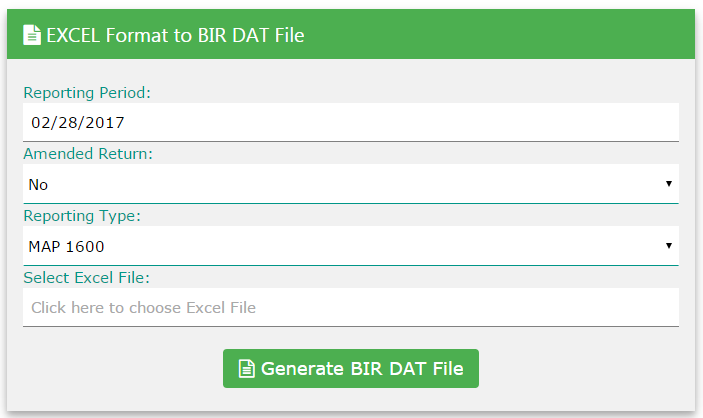
Generate DAT File
Once done on the template preparation and BIR Header Information,
its time to convert your excel file template to BIR DAT File. All fields
are required, accepts "xls" file only. Reporting Period is always end of
the month.
Choose the reporting type that you want to generate. Every reporting type has its own corresponding excel template. Please ensure that you are using the matching excel file template with the correct reporting type.
On this example, RELIEF Purchases matches Purchases Template.
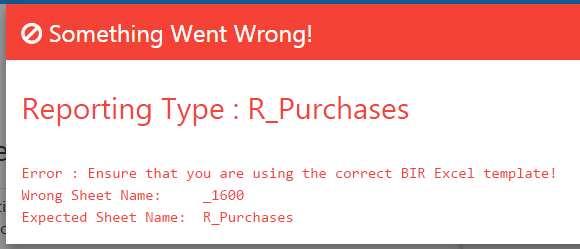
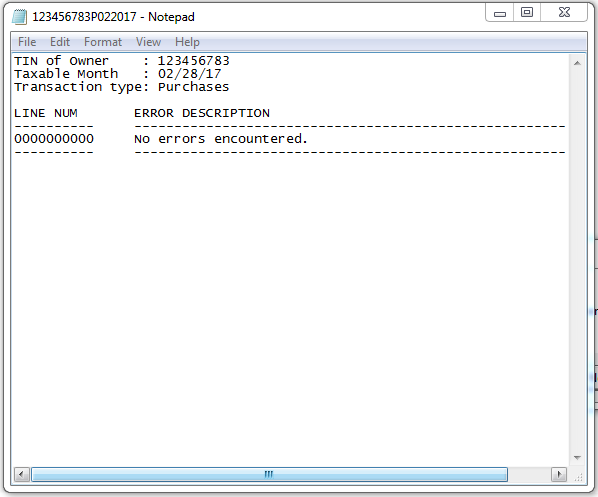
Click "Generate BIR DAT File". Keep attention on the error prompts, if any. Take time to understand what it is trying to say then adjust/revise accordingly.
Sample error below shows that reporting type does not match the
excel template by checking the sheetName(_1600) of the file.
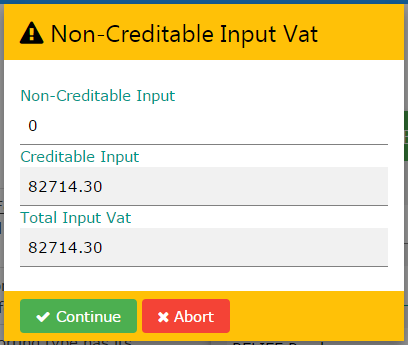
If there are no errors, proceed with inputing Non-Creditable
Input VAT if any, then click "Continue" to proceed or "Abort" to
cancel.
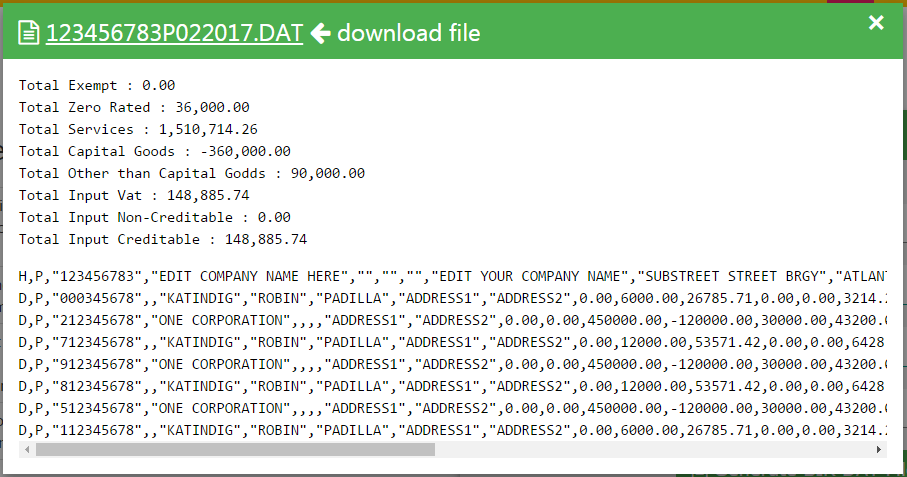
If you continue, generated dat file will be ready for download.
Double check all the balances to ensure file converted matches the
excel file template. Depends on your settings, usually downloaded
files were saved on your Downloads folder.
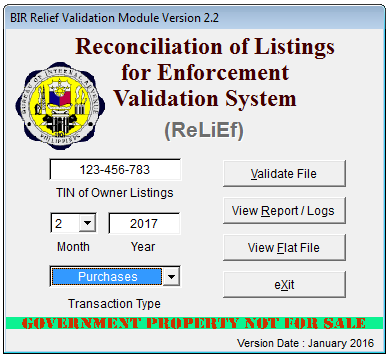
Validate DAT File
Before sending to
esubmission@bir.gov.ph, all DAT Files must be validated first. Open
BIR RELIEF Validation Module Version 2.2. Ensure that TIN, Reporting
Month and Reporting Type matches your DAT File.
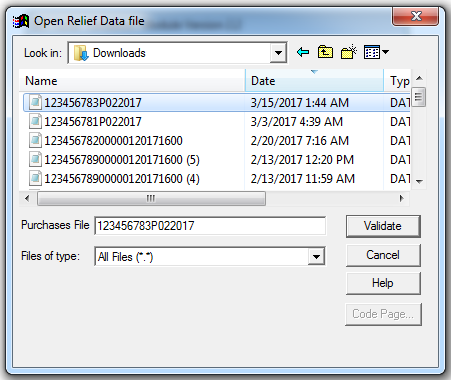
Click "Validate File" to browse the downloaded DAT File. In this
example the downloaded dat file is in the Downloads folder.
After selecting the downloaded file, click "Validate" to
generate the report. Select the folder where you want to save the
validation report then click "Select".
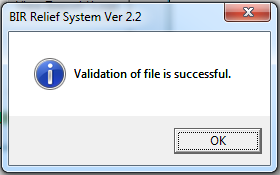
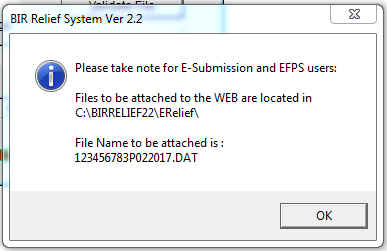
Validation Successful, you're ready to submit thru esubmission
or attach to EFPS
For EFPS users, please take note of the location of the file.
The validation module is appending a serial number at the end of the
DAT file.
For non-EFPS users, get your file from Downloads Folder.